We live in a world of information overload. We wanted to blend computer vision into our daily routines to solve the simple problem of having to scroll endlessly on our phones just to see the morning headlines.
Introducing AI Newscaster. It is a standalone desktop hardware device that blends computer vision with your daily work. When you press the SELECT button, we use native edge computer vision to check for the user’s presence. Once authenticated, your personalized daily news summary will instantly appear on your crisp LCD, and you’ll be able to navigate through the headlines at your own pace using the tactile button module. No bloated apps or subscriptions, just elegant edge computing.
What started as an over-engineered cloud/AI monster eventually evolved into beautiful, lightning-fast, dependency-free embedded hardware. By leveraging the dual architecture of the Arduino UNO Q (4GB), we built a dependency-free architecture that requires no API keys or rate limits, and uses pure native Python libraries to avoid traditional hardware bottlenecks.
Whether you’re a beginner who wants to understand edge vision or a developer who wants to get around the payload limitations of the Arduino bridge, this guide will show you exactly how to build it.
Grand vision vs. realityWhen I started, I planned to use heavy Python frameworks like OpenCV and large language models to summarize news. But as any hardware engineer knows, embedded systems have a way of forcing simplicity.
Building the cutting edge of Arduino’s App Lab meant running code in isolated, secure containers. This container did not have standard C++ build tools. Every time I tried to force a heavy library into my project, the system crashed. I realized that to make this accessible to beginners, reliable, and easily reproducible, I needed to completely rethink my approach.
Adopting a zero-dependency architectureInstead of fighting the hardware, I huddled with its constraints. I scrapped bloated software and adopted a strict “zero dependencies” architecture.
For the uninitiated, “dependencies” are external code libraries that must be downloaded in order for a program to work. Avoiding them made my project much faster and easier to replicate.
- vision: Instead of a custom OpenCV model, I used Arduino App Lab’s native Video Object Detection Brick, which connects directly to the webcam.
- data: Instead of paying for the News API, you can use Python’s built-in standard library (
urllibandxml) Get the live Google News RSS feed. There is zero memory overhead and no API keys are required.
The biggest technical hurdle was displaying long news summaries on a 2-inch screen. The two parts of the Arduino communicate through an internal bridge called the . Arduino_RPClite.
We quickly discovered that this bridge had a hard limit of 256 bytes per message. When I tried to send a long news briefing, the connection was cut off and the screen froze. Additionally, raw HTML tags and random line breaks (\n) in the newsfeed is fatal for serial communications.
To fix this, I invented the “Split-RPC architecture”. RPC stands for Remote Procedure Call and is a way for processors to communicate with each other. The main Python script does not send the entire news article, just the headline. This bypass natively streams the full 250 characters of text to the screen without crashing.
Final user experienceThe result is a responsive desk companion that works elegantly and is completely free to run. When you sit down and press the SELECT button, your device visually confirms your presence with a webcam and delivers your daily news.
Building an AI newscaster was an amazing task to remove bloat. This proves that you don’t need a large software stack to build intelligent devices.
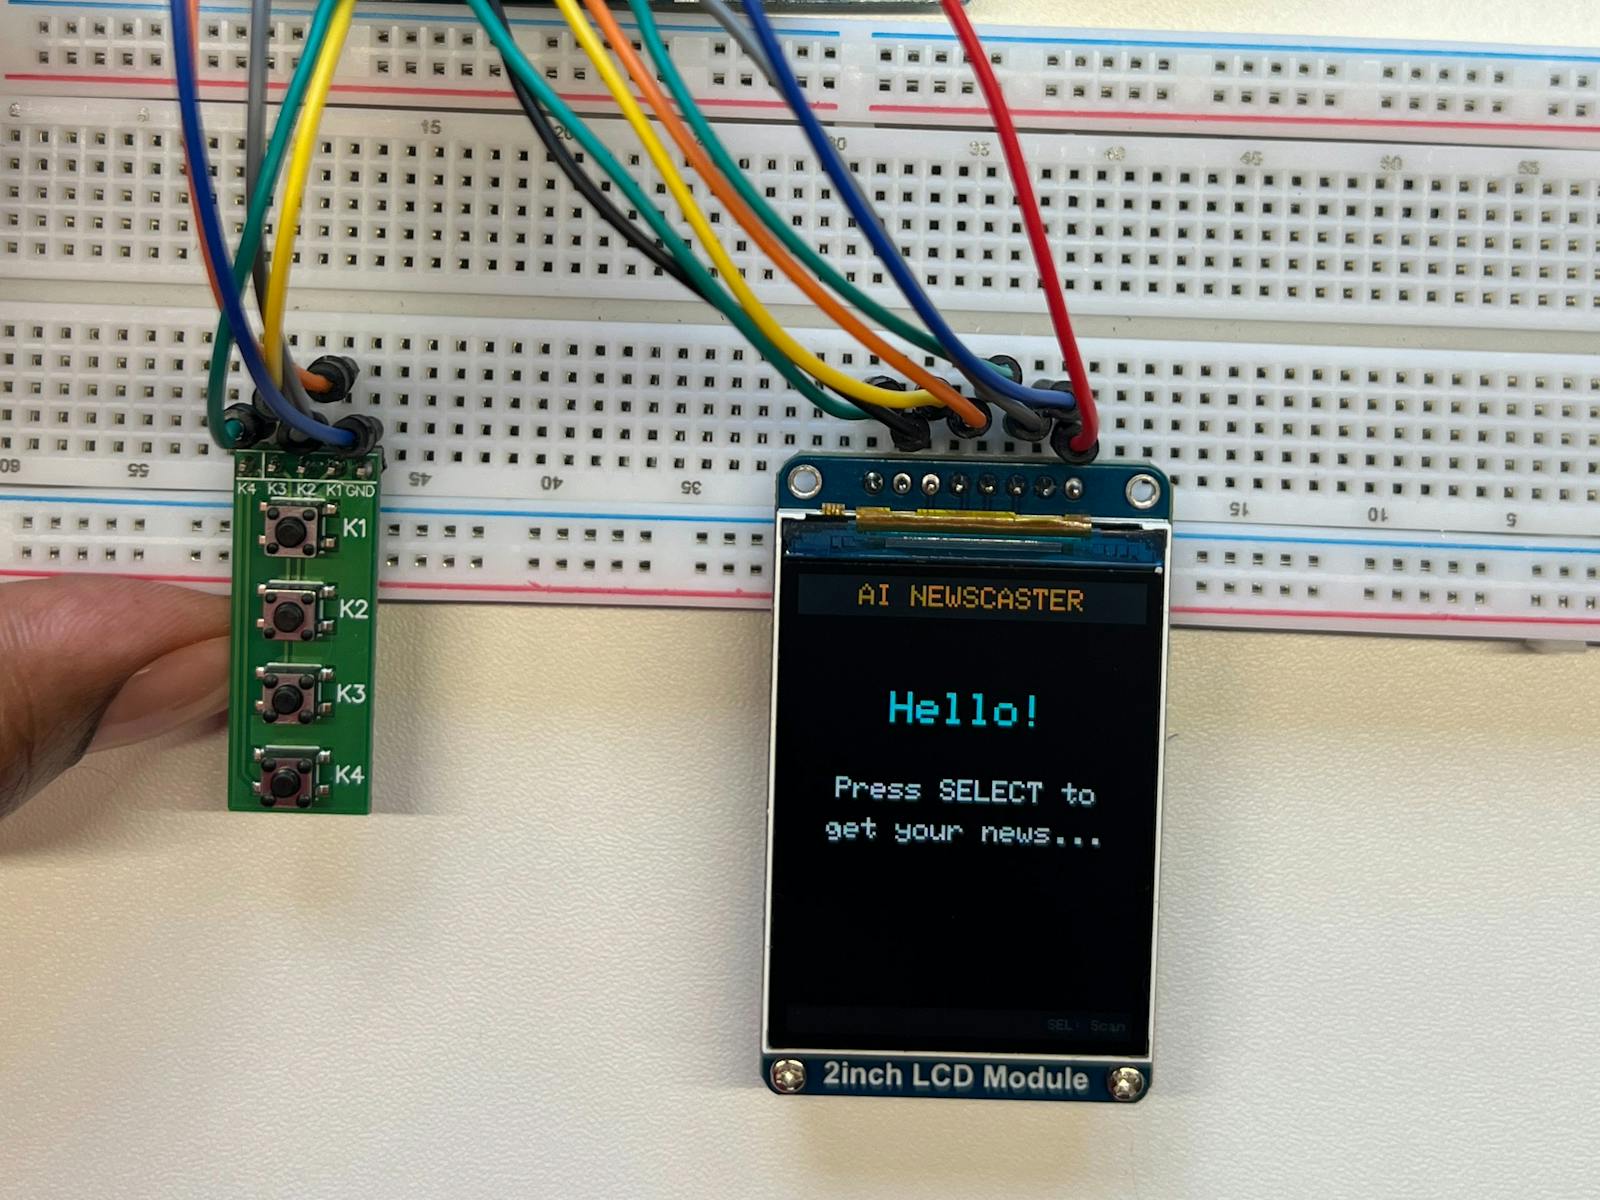
[Idle Screen: "Hello! Press SELECT to get your news..."] ──> [User Presses SELECT] ──> [Webcam Scans Face] ──> [Face detected] ──> [User Selects News Category] ──> [RSS parses] ──> [Feed renders on LCD]Idle screen: “Hello! Press SELECT to get news…”
User selects news category
This project takes a private and local approach. News is pulled directly from the Google News RSS feed using Python’s built-in standard library. This means no API keys or Google Cloud tokens are required, and there are no hard rate limits.
1. Download and install Arduino App Lab (version 0.7 and later).
2. Connect. Arduino UNO Q Connect to your workstation via a USB-C cable.
3. Terminal Click the tabs at the bottom of the App Lab workspace to communicate directly with the board’s Linux microprocessor unit (MPU).
4. Run the following command to start Visual Network Manager.
nmtui5. Use the arrow keys to go to Activate Connection, select your local WiFi network, enter your credentials, exit the utility and disconnect the board.
Step 2: Wire the hardwareWire the components according to the mapping table below.
ST7789V LCD to MCU pin mapping (SPI)
1×4 Tactile Button Module to MCU Pin Mapping
To complete the physical assembly, connect an Arduino 8-in-1 USB-C hub directly to the UNO Q’s main USB-C port, connect a mini webcam to the hub’s available USB-A port, and then connect it to your workstation via the USB-C PD port.
Step 3: Train the edge vision modelTo configure this brick to recognize users, train a lightweight, single-class face detection model.
1. Log in to edge impulse studio Create a project named AI-Newscaster-FaceDetect.
2. Upload a dataset of 200 to 500 facial images taken in various lighting conditions and angles. Be sure to select the option to automatically split data between training and testing.
3. Go to. Get data -> AI labelingchoose Bounding box labeling with OWL-ViTuse the prompt "A human face (face, 0.1)" Batch label the dataset.
Data Acquisition -> AI Labeling, select Bounding Box Labeling using OWL-ViT
4. Bottom impulse designset the image input size to 320×320 pixels (aligned to the shortest axis), and add an object detection learning block.
5.[オブジェクト検出]In the parameter, MobileNetV2 SSD FPN-Lite (320×320 only) architecture. Train the network for 50 cycles with a learning rate of 0.1.
6. Go to. introductionsearch for Arduino UNO Q platform, Not optimized (float32) Build the pipeline and generate the library. Copy the unique project ID from the URL in your browser.
Step 4: Set up and deploy your App Lab projectAfter preparing your assets, configure your runtime environment within the App Lab suite.
1. Open Arduino App Lab and create a project named. AI Newscaster.
2. brick insert the panel, video object detection block.
3.[AI モデル]link your Edge Impulse account credentials and select your trained face detection model. please confirm app.yaml The file explicitly lists the correct project model_id.
4. Open the App Lab Library Manager and Adafruit GFX Library together with Adafruit ST7735 and ST7789 Libraries.
5. The complete source code with comments can be found in the Attachments section. Upload your Python logic to the App Lab container and .ino Save the file to the MCU and place the camera on your desk.
click run In Applab, the platform automatically compiles the C++ sketch for STM32, deploys the vision container, and starts the Python environment.
Step 5: How to use AI NewscasterThere’s no need for a phone or computer, as the entire user experience happens entirely on your device. To ensure this, in the drop-down menu next to the app name, select[起動時に実行]Toggle options.
1. Power on your device using a 5V/3A power bank.
2. Wait until the following appears on the LCD. “Hello! Press SELECT to get news…”.
3. Press . choice Click the button to launch your webcam.
4. Look into the camera. Once it detects your face, select a news category and you’ll get a news briefing.
5. above and under Press the button to move between stories and press return Return to the standby screen.
The future is localWe are too focused on endless scrolling. AI newscasters give you back that time by moving intelligence from the cloud directly to your desk edge. UNO Q’s dual architecture creates a completely private, subscription-free, instantly responsive companion. The future of smart hardware is not about adding more layers of dependent software. It’s about making local hardware work smarter.